The Final Project in this module is a test to apply what we have learnt over the course of this academic semester.
The project can be about anything, provided it met the following criteria:
- A 3D printed item must be present.
- A laser cut item must be present.
- Arduino programming must be included, as well as some wiring of electronics.
All of the items must play a key role in the project. (e.g. the 3D printed item cannot be there as a placeholder)
In addition, we needed to make a 1-minute video about the project, an A4 sized poster about it as well as document the processes
made over the course of this project.
For my Final Project, I decided to try something different. I decided to group up with two of my classmates, Justin and Guo Liang to make one big project.
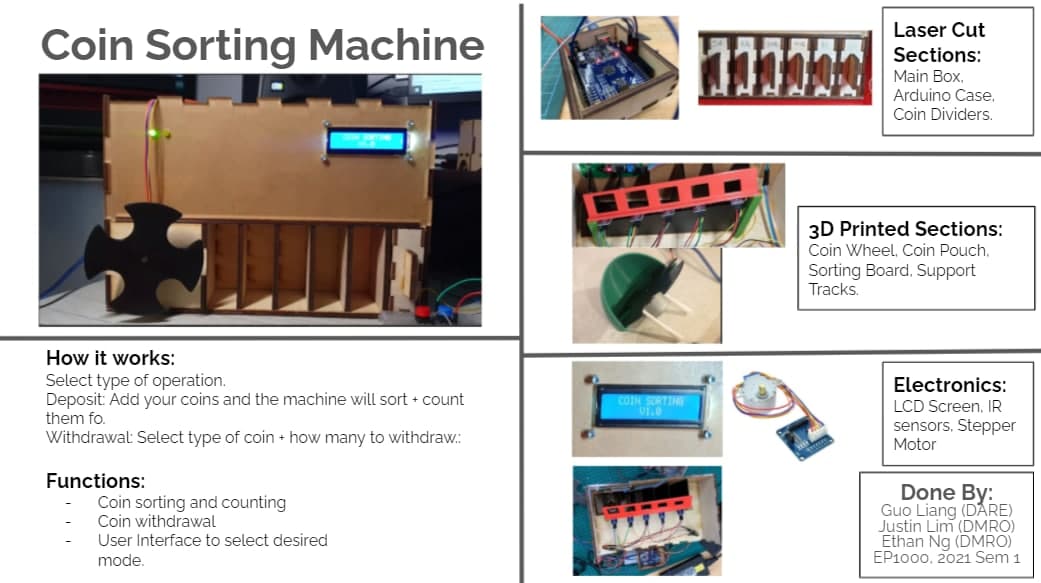
We decided to make a coin sorter that could count and sort out the newest generation of Singapore coins.
Before we could start on the project, we had to define what each member had to do. I decided to focus on the input system of the coin sorter.
Prototyping
To figure out how to make a proper coin sorter, we needed to figure out potential problems we might need to tackle.
The base idea was to create a sloped track with slots that fit a certain coin size in ascending size from 5 cents to 1 dollar. The coins
would roll down and fall into the assigned track based on the smallest slot that fits the coin. There would be a infared sensor detecting
the motion of a coin falling into the system, thus counting the number of coins sorted in this coin sorter system.
One such problem was ensuring the coins fall one at a time. This would ensure that the coins do not overlap and fall into the wrong section, as well as giving the counting
system some time in case the system could only scan one type of coin at a time.
Next, I had to figure out how the wheel was going to be powered. I initially went with a DC motor as it was the only motor I was initially
given to work with. However, as I would soon find out, the motor was not a good fit.
CAD (3D Modelling)
To model out the wheel, a few things must be considered.
Firstly, it has to be slightly thicker than a 5 cent coin. It had to be thin enough to be 3D printable, while ensuring
the wheel was not thick enough that any combination of coins could stack and get caught in the wheel simultaneously.
I decided to make the wheel about 10cm in diameter to make sure the wheel was large enough to make the holes big enough to scoop
the coins.
Holes were added to allow the coins to sit inside the hole.
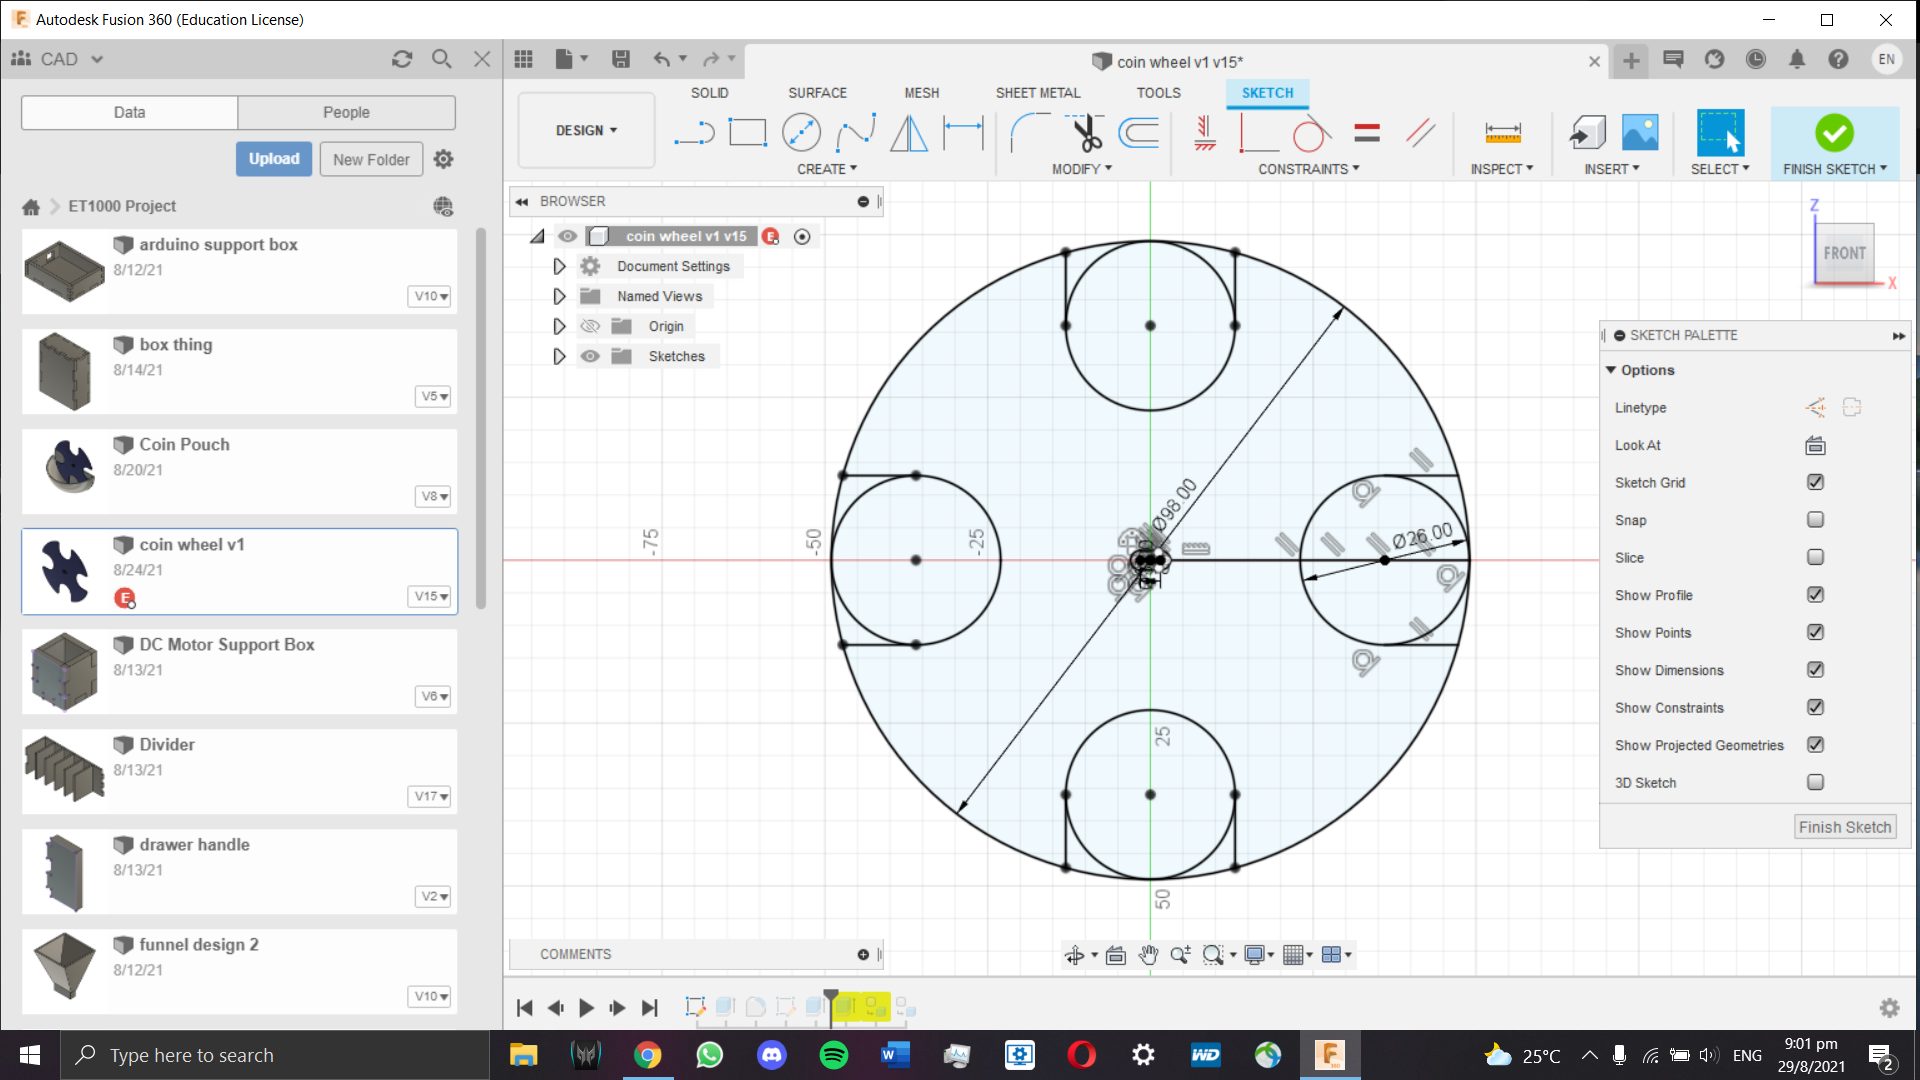
Afterwards, I made a hole in the center of the wheel to accomodate the motor which will be powering the wheel.
Finally, I extruded the wheel to the desired thickness of 1.25mm, which is just slightly thicker than a 5 cent coin. For reference, a 5 cent coin is 1.22mm thick, according to the Monetary Authority of Singapore.
A notch was created to improve the stability of the wheel.

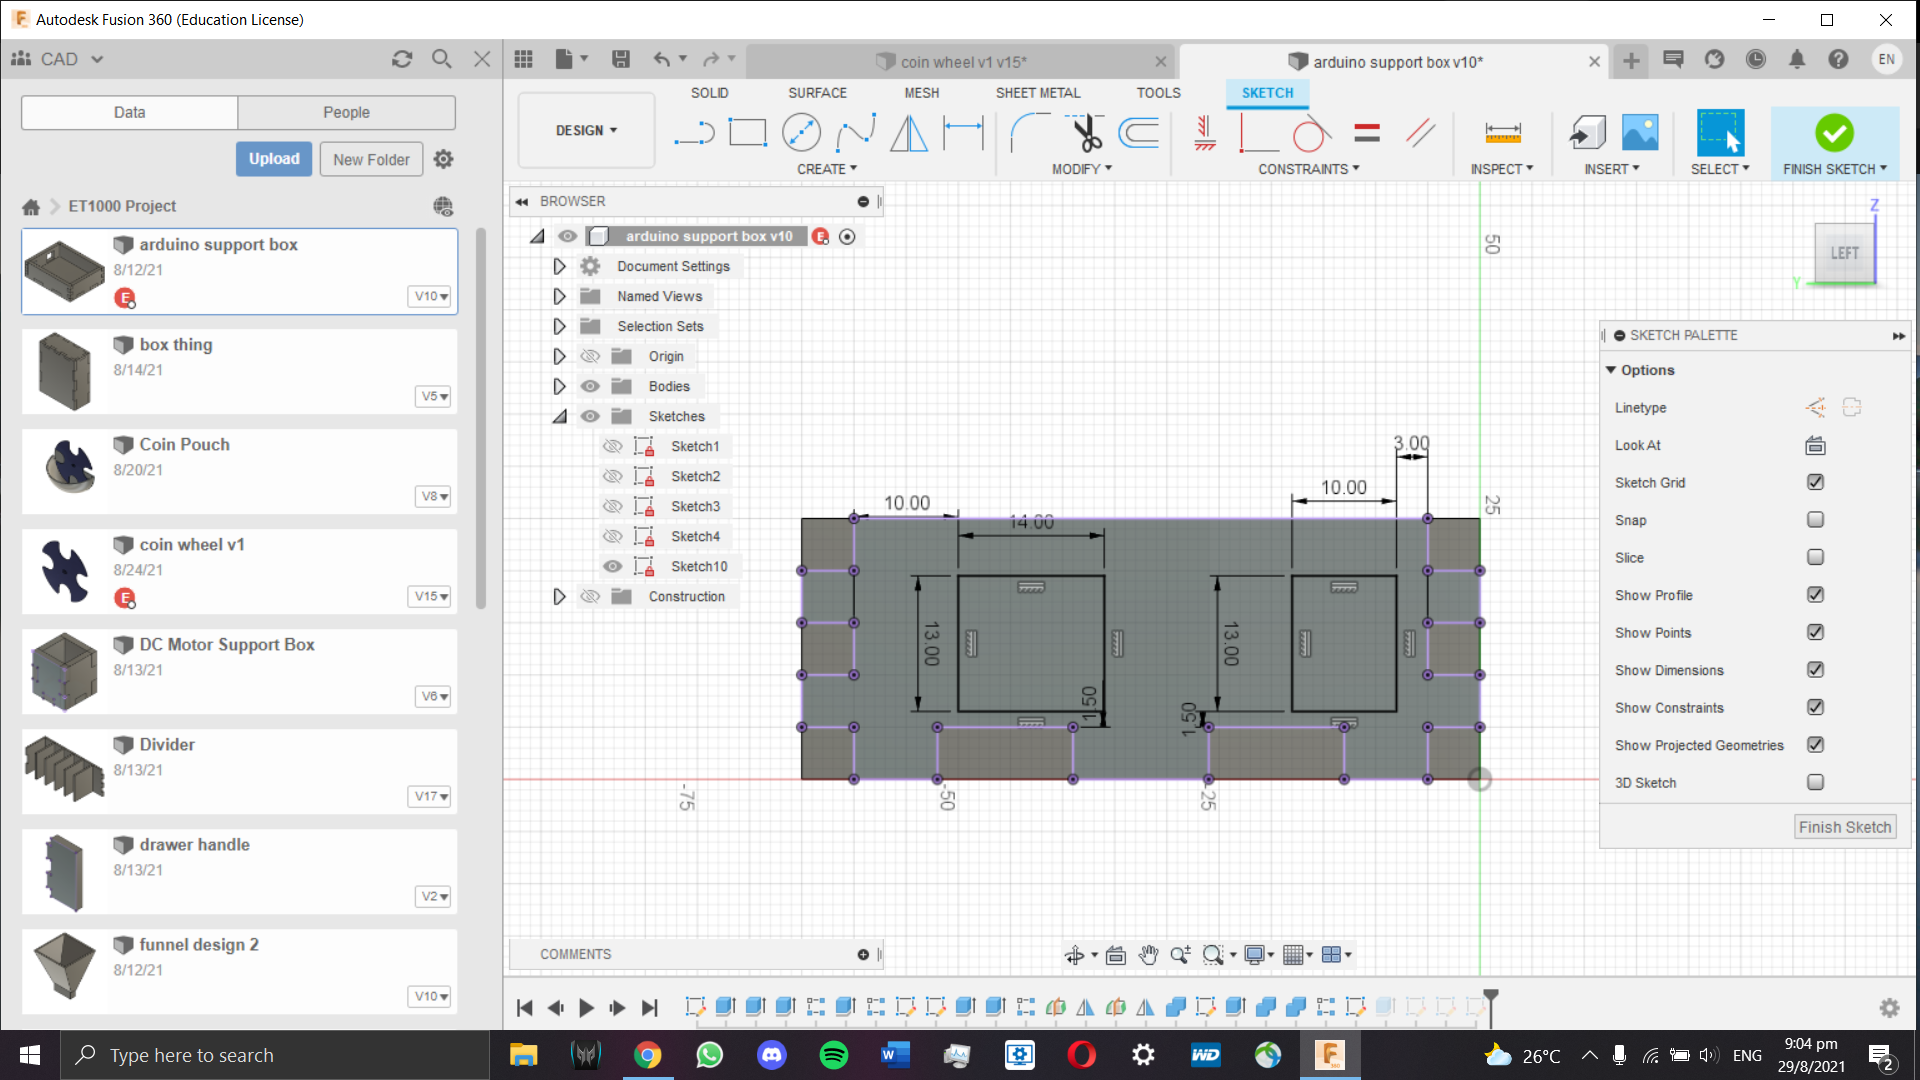
Arduino Case Supports:
To ensure the Arduino is well anchored into the sorter, I had to make a support box for it. For this model, I decided to reference
an old model I had created in this module. I made a copy of the old laser cut box and removed the lid plus hinge systems.
With the base and sides left, I edited the parametrics to ensure the Arduino UNO can fit. The following changes were made:
- Changed thickness to 5mm
- Adjusted length, with and height.
- Added 2 holes at the side for USB input and battery power.
Model Creation
3D Printing:
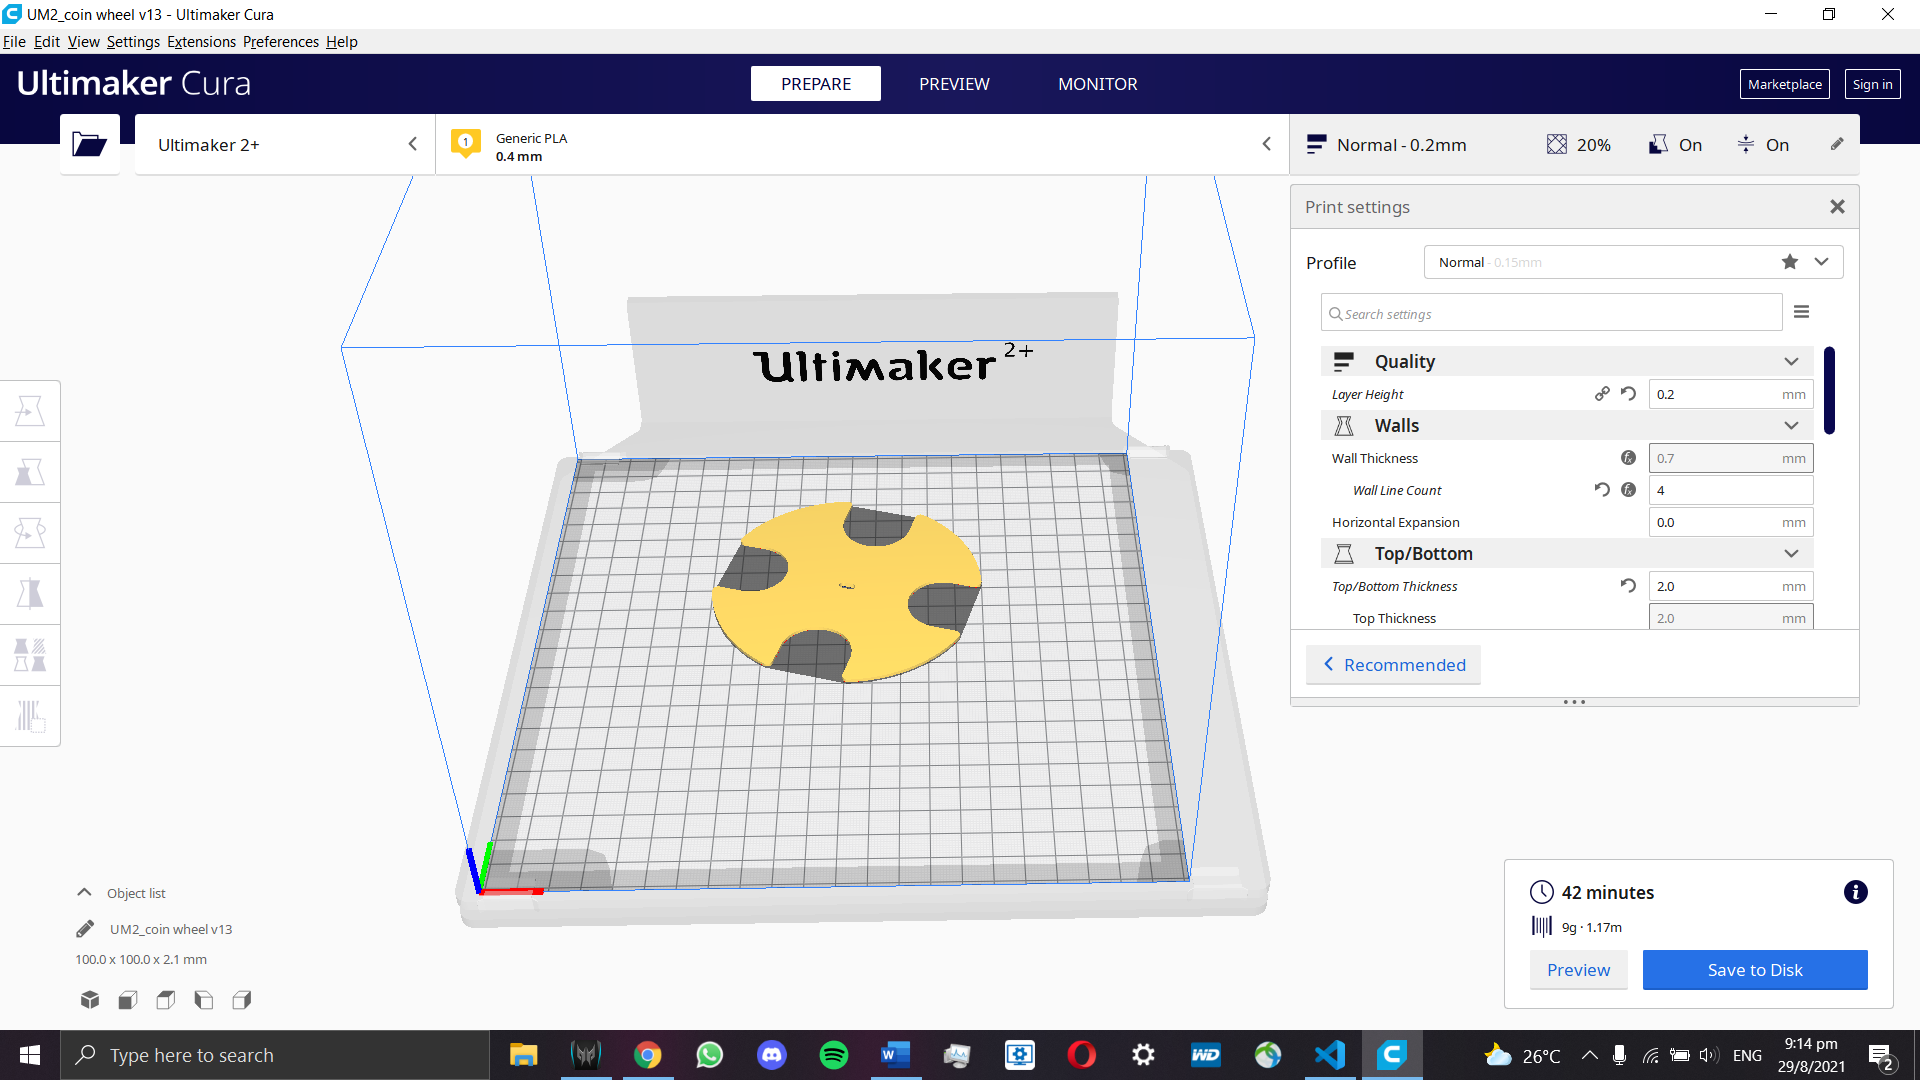
To create the coin wheel, I decided to lay it flat on the suface of the 3D printing bed to make printing easier. That way, the 3D printer layers
would be printing the thickness of the wheel, rather than the diameter of the wheel. Other settings were not changed from the last time I used Cura to 3D print
my knight chess piece.
Laser Cutting:
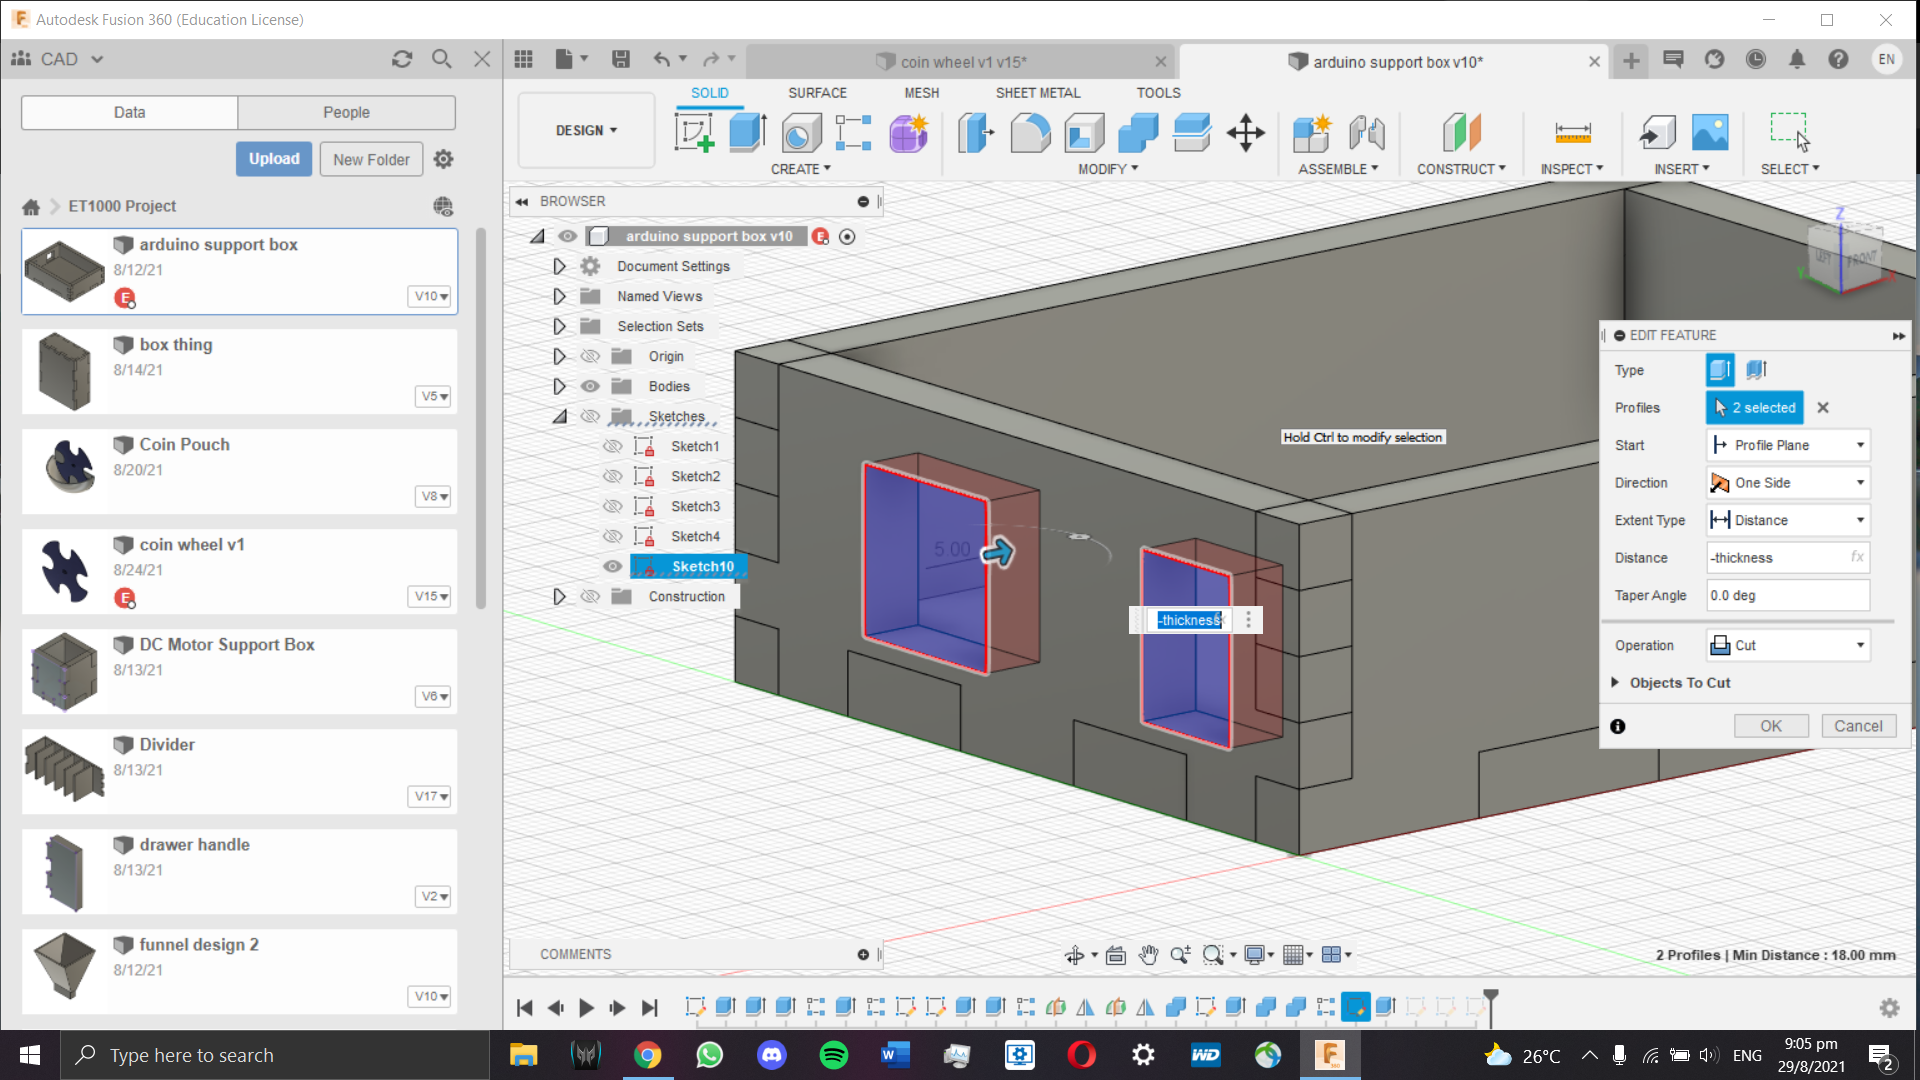
Initially, I made the box with just one hole for the USB input. However, after the first cut, I realised that not only would the Arduino not fit,
but also the hole would be necessary as a power source. Thus, I went to make the necessary changes and cut it a second time.
I also had a box designed for my DC motor to power the wheel, but it had to be abandoned after I realised the motor would not be a good
fit (the speed was too fast).
Thus, to take its place was a BYJ-48 Stepper Motor. It rotates much slower than the original DC motor I had.
In its place two supports will be 3D printed to anchor the new stepper motor to the coin pouch done by Guo Liang.
Wiring:
Wiring was not too big of an issue since the only wiring I needed to do was to connect the stepper motor to the breadboard. No resistors
were needed, thus it could be connected straight to 5V and GND.
Arduino Programming:
I decided to use a reference code made by Mohannad Rawashdeh to assist me. The code linked is meant to be used as a bi-directional motor
which will count down a fixed number of steps, stops for a second and changes direction.
Variable Definition:
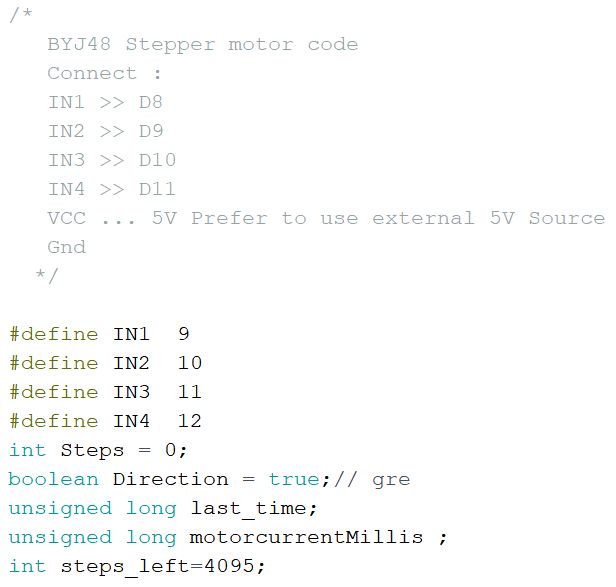
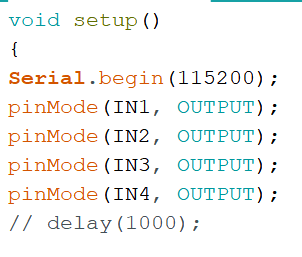
Pin Inputs:
Later on I decided to change the input pins from 8 - 11 to pins 9 - 12 to accomodate other input pins used by Justin and Guo Liang's section of this project.
This section of the code creates a loop that forces the motor to keep going.
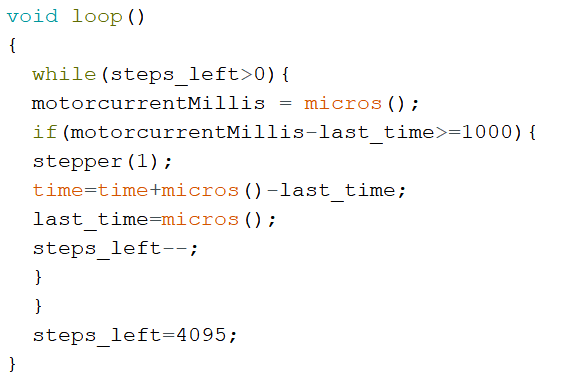
This section of code determines the direction the motor goes. In this case it goes clockwise.

To ensure the motor works the way I want it to, I removed a few things:
- if(Direction==0){ Steps--; } Removed to ensure the motor does not change direction under the SetDirection function of the code.
- This section of the code was removed as no delay or reversing direction is needed.
"Serial.println(time);
Serial.println("Wait...!");
delay(2000);
Direction=!Direction;
steps_left=4095;"
- I also removed "while(steps_left>0)" during integration with Justin and Guo Liang's code to ensure the code would not be stuck running the void loop function.
One thing to note is that since the stepper motor isn't that fast to begin with, there is no need to set its speed.
Below is how the stepper motor would work:
Assembly, Integration and Troubleshooting
Since this is a group project, this section would be by far the hardest part out of all.
Integration is where problems would arise and where troubleshooting gets very tiring.
After the coin pouch was printed, we realised that there were a few problems.
First was that the pouch was extremely tight, so much that the stepper motor lacked the torque to power the wheel smoothly.
Thus, the wheel had to be sanded quite a bit and the pouch needed some filing to ensure no bumps in the wheel movements.
The pouch was also not angled steep enough to make sure all coins were positioned vertically for the wheel to scoop up.
Thus, it had to be re-adjusted so the pouch, wheel and motor are positioned horizontally, above the track where the coins get sorted.
Integrating the code was also another problem. While integrating the code, I had to change my input ports to pins 10, 11, 12, 13. I also had to troubleshoot
issues such as the code only executing the stepper motor section due to it being stuck in the while loop "while(steps_left>0)".
Final Product
As the file sizes of the videos are too large, I have uploaded them onto Google Drive for viewing.
Testing Videos
Reflections
In hindsight, this was a very ambitious project to do. Since the project requirements demand each member's contributions
fulfil the project requirements, that means that group projects get exponentially harder to fit content for everyone. It also
did not help that all of us had other projects and exams to prepare for, further constraining the amount of time we had to work on the
project. Communication is very important especially in group projects as integration and troubleshooting would be a pain to do without
proper communication. I am very thankful to Justin and Guo Liang for their valuable contributions to this project. Without them, this would not
have been such a success.